Working with Templates
Introduction:
DFMs have the ability to build very large and complex DataFlows using data integration platform.
This is achieved by using the basic components: Processor, Funnel, Input/Output Port, Process Group, and Remote Process Group. These can be thought of as the most basic building blocks for constructing a dataFlow.
At times, though, using these small building blocks can become tedious if the same logic needs to be repeated several times.To solve this issue, data integration platform provides the concept of a template.
A template is a way of combining these basic building blocks into larger building blocks. Once a DataFlow has been created, parts of it can be formed into a template.
This template can then be dragged onto the canvas, or can be exported as an XML file and shared with others. Templates received from others can then be imported into an instance of data integration platform and dragged onto the canvas.
Creating a Template
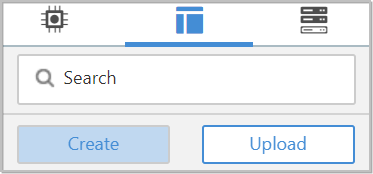
- To create a template, select the components that are to be a part of the template, and then click the Create button in the templates (
 ) tab.
-
Clicking this button without selecting anything will create a template that contains all of the contents of the current process group. This means that creating a template with nothing selected while on the root process group will create a single template that contains the entire flow.
-
After clicking this button, the user is prompted to provide a name and an optional description for the template.
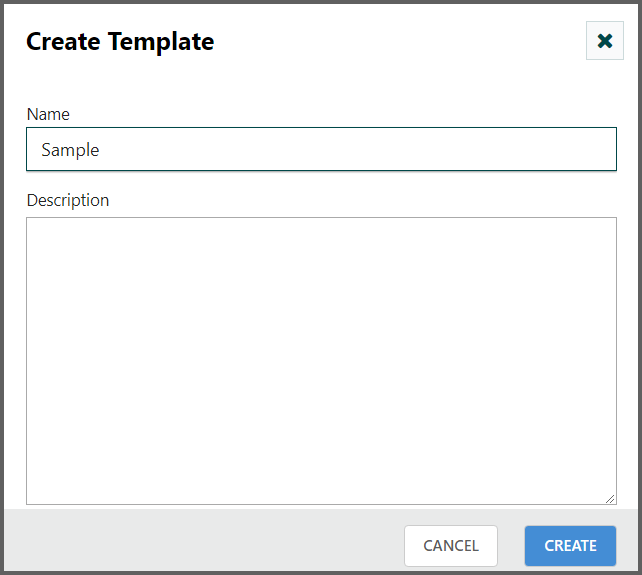
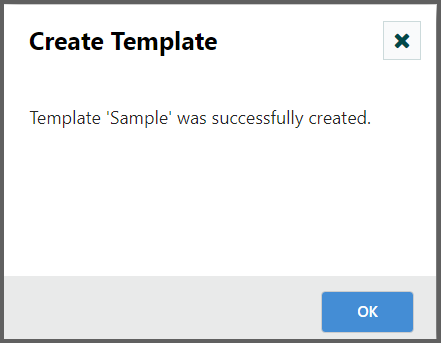
- Each template must have a unique name. After entering the name and optional description, clicking the Create button will generate the template and notify the user that the template was successfully created, or provide an appropriate error message if unable to create the template for some reason.
IMPORTANT
It is important to note that if any processor that is templated has a sensitive property (such as a password), the value of that sensitive property is encrypted and included in the template. As a result, when dragging the template onto the canvas,their sensitive properties will be decrypted and retained. Additionally, any connection that was selected when making the template is not included in the template if either the source or the destination of the connection is not also included in the template.
Importing a Template
-
After receiving a template that has been exported from another data integration platform, the first step needed to use the template is to import the template into this instance of data integration platform. You may import templates into any process group where you have the appropriate authorization.
-
From the templates (
) tab, click the Upload button. -
This will display the upload template dialog. Click the find icon and use the file selection dialog to choose which template file to upload. Select the file and click Open.
-
Click on the upload button will attempt to import the template into this instance of data integration platform.
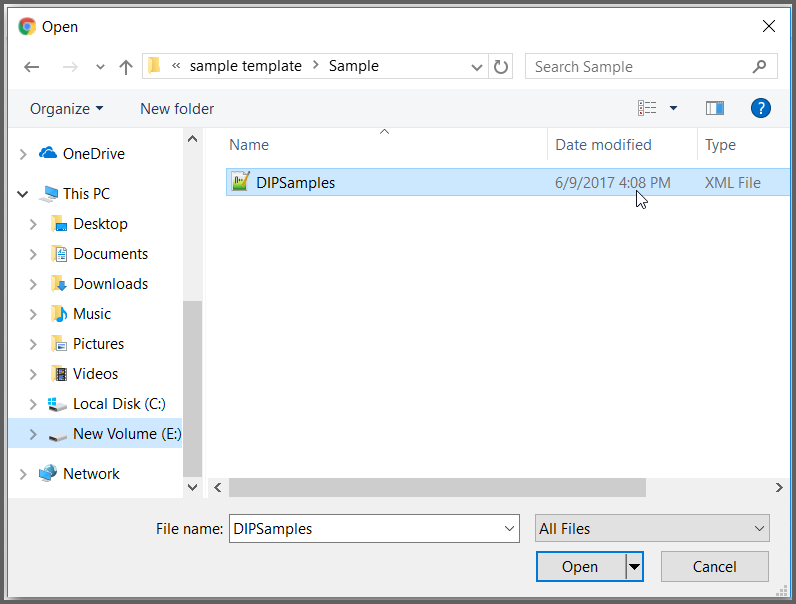
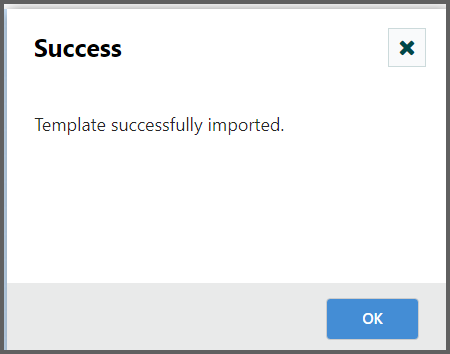
- The upload template dialog will update to show Success or an error message if there was a problem importing the template.
Instantiating a Template
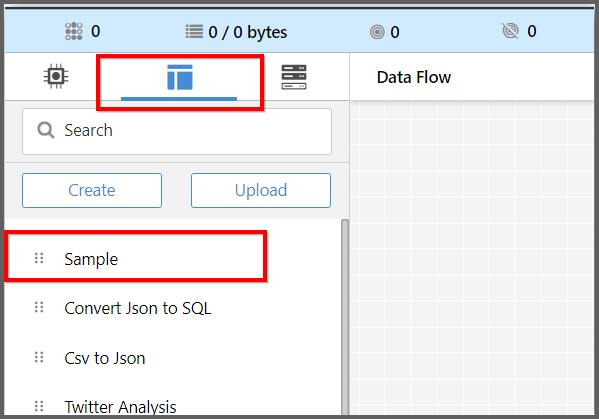
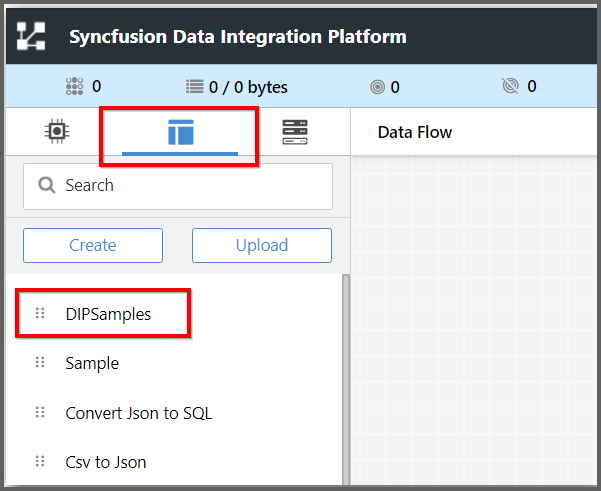
- Once a template has been created (see Creating a Template) or imported (see Importing a Template), it is ready to be instantiated, or added to the canvas. This is accomplished by dragging the particular template from the Templates () tab onto the canvas.
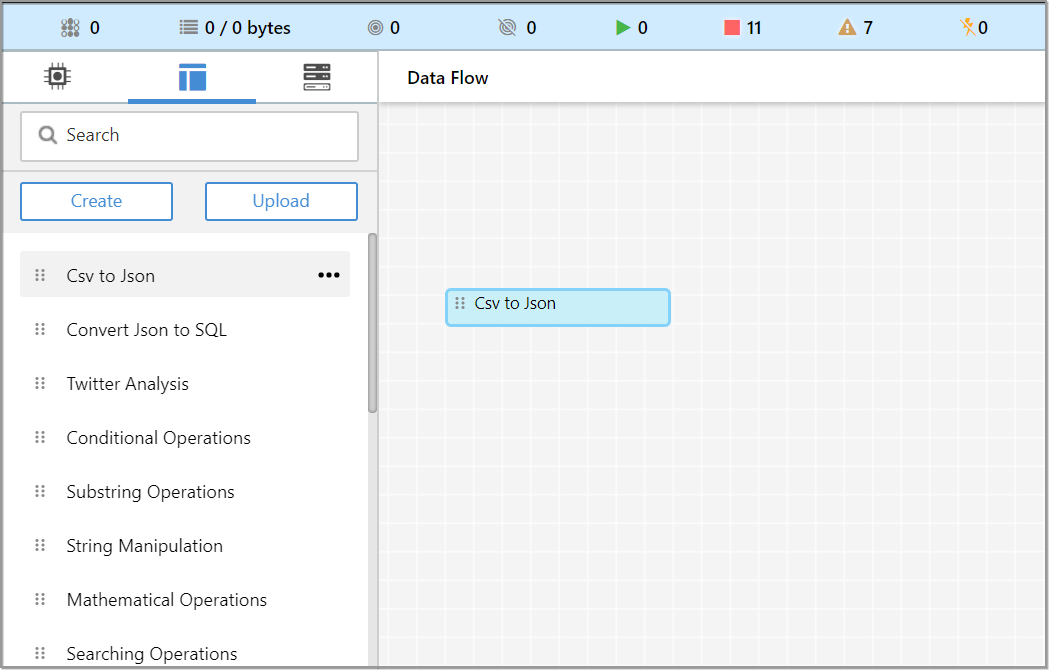
- The template will be added to the canvas with the upper-left-hand side of the template being placed wherever the user dropped the template.
- This leaves the contents of the newly instantiated template selected. If there was a mistake, and this template is no longer wanted, it may be deleted.
Managing Templates
-
One of the most powerful features of data integration platform is the ability to easily export a template to an XML file and to import a template that has already been exported.
-
This provides a very simple mechanism for sharing parts of a dataflow with others. The components toolbar (see Data Integration User Interface) has a tab for managing templates (
). -
Click on this tab allows the user to see all of the templates that are currently available, filter the templates to see only those of interest, and import, export, and delete templates.
Exporting a Template
Once a template has been created, it can be shared with others in the template management page (see Managing Templates).
- To export a template, locate the template from the templates tab.
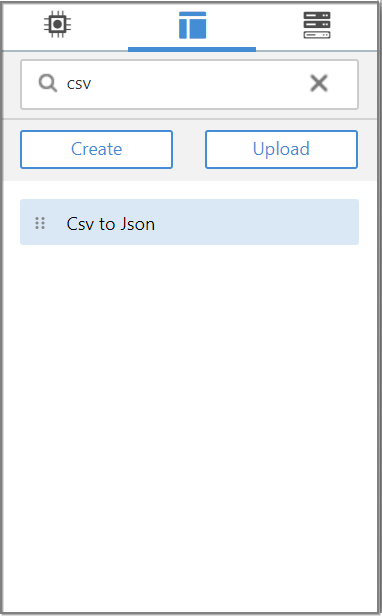
Filter Templates:
-
The search box in the top-left corner can be used to help find the appropriate template if several are available.
-
Enter the name of the template in search box. Then it will show the filtered templates.
- Then select “Download” by expanding the dropdown (
 ).
).
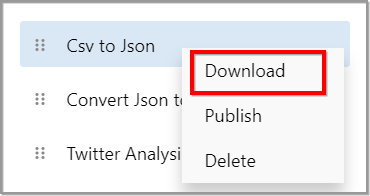
- This will download the template as an XML file to your computer. This XML file can then be sent to others and imported into other instances of data integration platform(see Importing a Template).
Removing a Template
-
Once it is decided that a Template is no longer needed, it can be easily removed from the templates tab (see Managing Templates).
-
To delete a Template, locate it in the Templates tab (the Search box in the top-left corner may be used to find the appropriate template if several are available)
-
Select the “Delete” by expanding the dropdown (
).
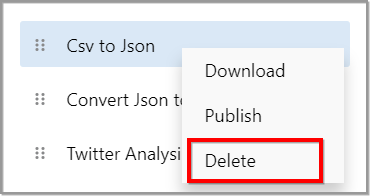
- This will prompt for confirmation.
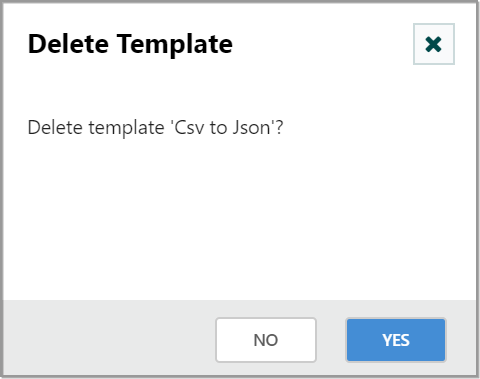
- After confirming the deletion, the Template will be removed from this table and will no longer be available to add to the canvas.
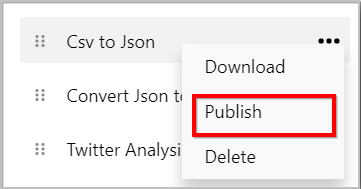
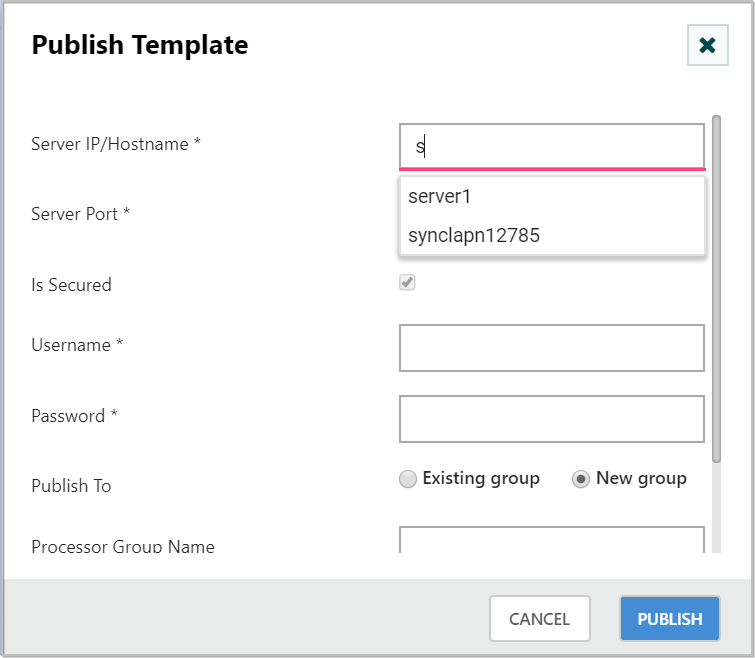
Publish Template:
- To publish a template into remote data integration platform instance,select the “Publish” by expanding the dropdown () of the template to be published.
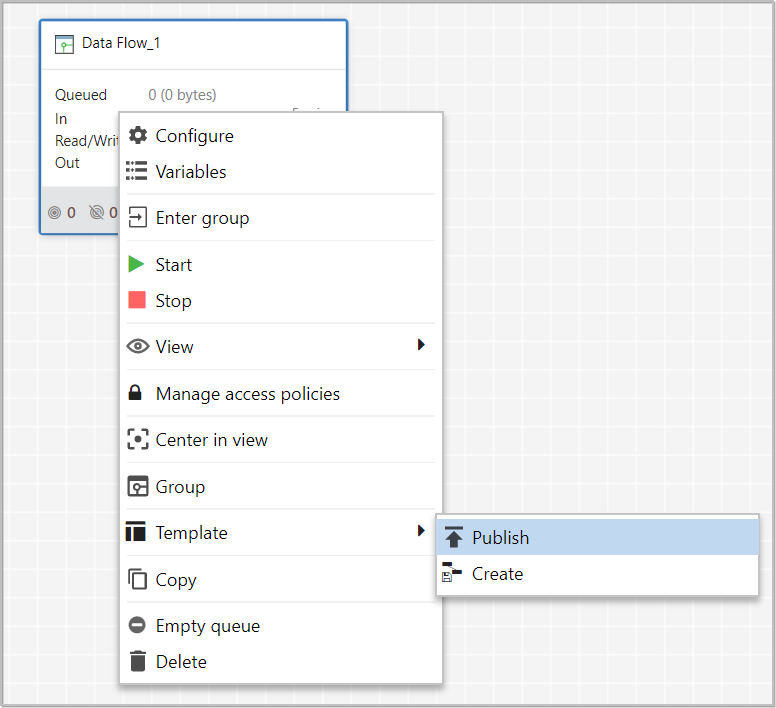
- To publish a selected components from canvas into remote data integration platform instance, select the components and right-click on the items for context menu and choose
publishitem.
- Provide the remote server IP address/Hostname and Port(if default port changed),process group to be published.
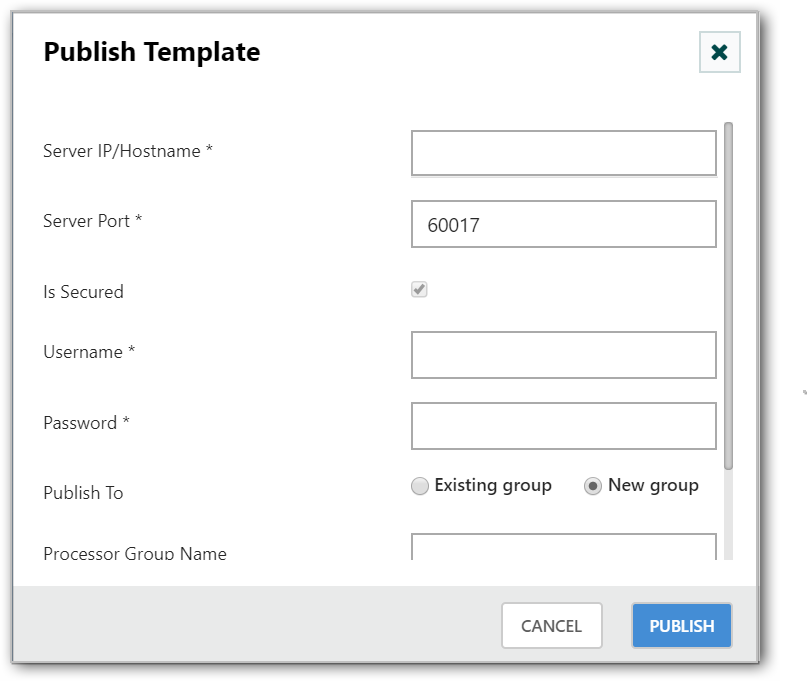
- To publish template for the server which is already added,you can select it using auto complete option in hostname field.
-
Process group name if you want to publish in new group and name of the template if you have selected publish option from context menu.
-
To publish template into a secured Data Integration instance, select “Is Secured” check box and provide username and password details.
IMPORTANT
If a component that is included in the template references a controller service, the controller service will also be added to the template. This means that each time that the template is added to the graph, it will create a copy of the controller service.