Getting Started with WPF Report Viewer
7 May 202110 minutes to read
Creating ReportViewer through Visual Studio
You can create a simple application through the Visual Studio Designer with the Syncfusion WPF ReportViewer control by using the following steps.
-
Create new WPF application in Visual Studio.
-
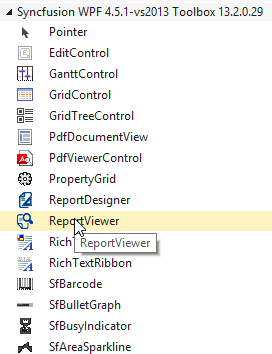
Add the ReportViewer from the Toolbox.
Drag and drop the ReportViewer control from the Toolbox to the XAML Page.
-
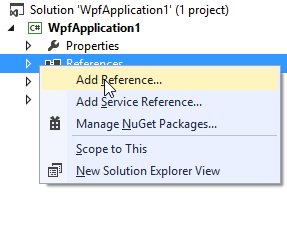
To add references, Right-click on References and select Add Reference.
-
Add the following assemblies.
- Syncfusion.Chart.Wpf
- Syncfusion.Compression.Base
- Syncfusion.DocIO.Base
- Syncfusion.Gauge.Wpf
- Syncfusion.Grid.Wpf
- Syncfusion.Linq.Base
- Syncfusion.Pdf.Base
- Syncfusion.PropertyGrid.Wpf
- Syncfusion.ReportControls.Wpf
- Syncfusion.ReportDesigner.Wpf
- Syncfusion.ReportViewer.Wpf
- Syncfusion.SfMaps.Wpf
- Syncfusion.SfSkinManager.Wpf
- Syncfusion.Shared.Wpf
- Syncfusion.Tools.Wpf
- Syncfusion.XlsIO.Base
NOTE
Refer the above assemblies from the installed location, C:\Program Files (x86)\Syncfusion\Essential Studio\WPF\25.1.35\Assemblies
-
Add the following code for creating ReportViewer using code.
<sync:ChromelessWindow x:Class="Syncfusion.Samples.ReportView" xmlns="http://schemas.microsoft.com/winfx/2006/xaml/presentation" xmlns:x="http://schemas.microsoft.com/winfx/2006/xaml" xmlns:sync="http://schemas.syncfusion.com/wpf" xmlns:local="clr-namespace:Syncfusion.Samples.ViewModel" xmlns:localUtil="clr-namespace:Syncfusion.Samples.Util" Title="Product Catalog" WindowStartupLocation="CenterScreen" SnapsToDevicePixels="True" WindowState="Maximized" TitleTextAlignment="Center" ShowIcon="False" UseNativeChrome="True" Icon="App.ico"> <Grid Name="gridSkeleton" localUtil:EventAttachUtil.AddWindowLoaded="True"> <Border Name="groupBoxReportViewer" BorderThickness="0" > <Grid> <sync:ReportViewer Name="viewer" /> </Grid> </Border> </Grid> </sync:ChromelessWindow> -
Set
ReportPathandProcessingModeto the ReportViewer.<sync:ReportViewer Name="viewer" ReportPath="..\ReportTemplate\InvoiceTemplate.rdl" ProcessingMode="Remote" /> -
Set Visual Style to the ReportViewer.
SkinStorage.SetVisualStyle(this, "Metro"); -
Run the sample application and you can see the ReportViewer as displayed in the following screenshot.

Show RDLC Reports
-
Assign
ReportPathandProcessingModeto ReportViewer.Syncfusion.Windows.Reports.Viewer.ReportViewer viewer= new Syncfusion.Windows.Reports.Viewer.ReportViewer; viewer.ReportPath=@"../ReportTemplate/RDLC/ProductCatalog.rdlc"; viewer.ProcessingMode = ProcessingMode.Local; -
Set Datasource to the RDLC Report and invoke
RefreshReportto render the report.viewer.DataSources.Clear(); viewer.DataSources.Add(new ReportDataSource { Name = "ProductCatalog", Value = ProductCatalog.GetData() }); viewer.RefreshReport(); -
Assign values for the datasource in RDLC.
#region Product details public class ProductCatalog { public string ProdSubCat { get; set; } public string ProdModel { get; set; } public string ProdCat { get; set; } public string Description { get; set; } public string ProdName { get; set; } public string ProductNumber { get; set; } public string Color { get; set; } public string Size { get; set; } public double? Weight { get; set; } public double? StandardCost { get; set; } public string Style { get; set; } public string Class { get; set; } public double? ListPrice { get; set; } public static IList GetData() { List<ProductCatalog> datas = new List<ProductCatalog>(); ProductCatalog data = null; data = new ProductCatalog() { ProdSubCat = "Road Frames", ProdModel = "HL Road Frame", ProdCat = "Components", Description = "Our lightest and best quality aluminum frame made from the newest alloy; it is welded and heat-treated for strength. Our innovative design results in maximum comfort and performance.", ProdName = "HL Road Frame - Black, 58", ProductNumber = "FR-R92B-58", Color = "Black", Size = "58", Weight = 2.24, StandardCost = 1059.3100, Style = "U ", Class = "H ", ListPrice = 1431.5000 }; datas.Add(data); data = new ProductCatalog() { ProdSubCat = "Road Frames", ProdModel = "HL Road Frame", ProdCat = "Components", Description = "Our lightest and best quality aluminum frame made from the newest alloy; it is welded and heat-treated for strength. Our innovative design results in maximum comfort and performance.", ProdName = "HL Road Frame - Red, 58", ProductNumber = "FR-R92R-58", Color = "Red", Size = "58", Weight = 2.24, StandardCost = 1059.3100, Style = "U ", Class = "H ", ListPrice = 1431.5000 }; datas.Add(data); data = new ProductCatalog() { ProdSubCat = "Helmets", ProdModel = "Sport-100", ProdCat = "Accessories", Description = "Universal fit, well-vented, lightweight , snap-on visor.", ProdName = "Sport-100 Helmet, Red", ProductNumber = "HL-U509-R", Color = "Red", Size = "", Weight = null, StandardCost = 13.0863, Style = "", Class = "", ListPrice = 34.9900 }; datas.Add(data); return datas; } } #endregion -
Run the application. The following output is displayed.

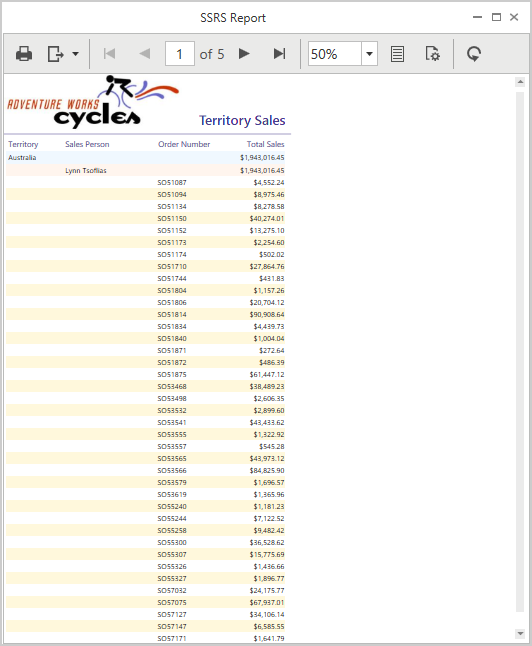
Load SSRS Reports
-
To load SSRS reports, initialize ReportViewer control and set the
ReportPath,ProcessingModeandReportServerUrl.Syncfusion.Windows.Reports.Viewer.ReportViewer viewer = new Syncfusion.Windows.Reports.Viewer.ReportViewer(); viewer.ReportPath = @"/SSRSSamples/Territory Sales"; viewer.ReportServerUrl = @"http://mvc.syncfusion.com/reportserver"; viewer.ProcessingMode = ProcessingMode.Remote; viewer.ReportServerCredential = new System.Net.NetworkCredential("ssrs", "RDLReport1"); -
Add the credential information to the datasource.
List<DataSourceCredentials> crdentials = new List<DataSourceCredentials>(); foreach (var dataSource in viewer.GetDataSources()) { DataSourceCredentials credn = new DataSourceCredentials(); credn.Name = dataSource.Name; credn.UserId = "ssrs1"; credn.Password = "RDLReport1"; crdentials.Add(credn); } viewer.SetDataSourceCredentials(crdentials); viewer.RefreshReport(); -
Run the application. The following output displays.