Getting Started
18 Aug 20238 minutes to read
This section explains briefly about how to create an UploadBox in ASP.NET MVC application .
Create your first UploadBox in MVC
ASP.NET MVC UploadBox provides support to upload the files or photos within your web page. From the following guidelines, you can learn how to upload the file that is used in a Resume Upload scenario. This helps you to restrict some file extensions, while uploading the resume in the server by using UploadBox control. The following screenshot demonstrates the functionality of UploadBox with file extension.
In the above screenshot, you can upload a resume. It allows .png and .docx file extension. This enables you to avoid unsupported resume formats to be uploaded in the server.
Create UploadBox widgets
ASP.NET MVC UploadBox basically renders built-in features like upload multiple files, and deletes the files from Uploadbox. You can know the status of the file whether it is complete or fail and also can retry the upload if it failed. You can easily create the UploadBox widget by using the following steps.
You can create an MVC project and add necessary assemblies, styles, and scripts with the help of the given MVC-Getting Started Documentation.
Add the following code example to the corresponding view page to render the UploadBox.
@Html.EJ().Uploadbox("UploadDefault").SaveUrl(@Url.Action("SaveDefault")).RemoveUrl(@Url.Action("RemoveDefault"))Add the following ActionResult in your controller.
public ActionResult SaveDefault(IEnumerable<HttpPostedFileBase> UploadDefault)

	{

		foreach (var file in UploadDefault)

		{

			var fileName = Path.GetFileName(file.FileName);

			var destinationPath = Path.Combine(Server.MapPath("~/App_Data"), fileName);

            file.SaveAs(destinationPath);

		}

		return Content("");

	}
Add the following Remove ActionResult in your controller page.
public ActionResult RemoveDefault(string[] fileNames)

	{

		foreach (var fullName in fileNames)

		{

			var fileName = Path.GetFileName(fullName);

			var physicalPath = Path.Combine(Server.MapPath("~/App_Data"), fileName);

			if (System.IO.File.Exists(physicalPath))

			{

				System.IO.File.Delete(physicalPath);

			}

		}

		return Content("");

	}
Execute the project to render the following output for the given steps. The file is being uploaded.
UploadBox after uploading
Set Restriction for File Extension
In a real-time scenario, some file extensions are restricted. You can either allow files or restrict files by using extensionsAllow and extensionsDeny respectively in Uploadbox.
NOTE
The SaveUrl and RemoveUrl are the same as above
Add the following elements in the view page.
<div id="targetElement">
    <table id="uploadTable">
        <tr>
            <td>
                Extensions:
            </td>
            <td></td>
        </tr>
        <tr>
            <td>
                <input type="text" id="Allow" class="ejinputtext" placeholder="Format" />
                @(Html.EJ().Button("upbutton1").Text("Allow").ClientSideEvents(c => c.Click("allow")))
            </td>
            <td></td>
        </tr>
        <tr>
            <td>
                <input type="text" id="Deny" class="ejinputtext" placeholder="Format" />
                @(Html.EJ().Button("upbutton2").Text("Deny").ClientSideEvents(c => c.Click("deny")))
            </td>
            <td>
               @Html.EJ().Uploadbox("UploadDefault").SaveUrl(@Url.Action("SaveDefault")).RemoveUrl(@Url.Action("RemoveDefault")))
            </td>
        </tr>
    </table>
</div>
Add the following code example in script section.
var object;
    $(function () {
        object = $("#UploadDefault").data("ejUploadbox");
        $("#upbutton1").ejButton({
            click: "allow",
        });
        $("#upbutton2").ejButton({
            click: "deny",
        });
    });
    function allow() {
        object.option('extensionsAllow', $("#Allow").val());
        object.option('extensionsDeny', "");
    }
    function deny() {
        object.option('extensionsAllow', "");
        object.option('extensionsDeny', $("#Deny").val());
    }
Add the given styles to display the Uploadbox with margin alignments.
#targetElement {
        width: 520px;
        height: 500px;
        margin: 0 auto;
    }

    #UploadDefault {
        float: right;
    }

    #uploadTable {
        width: 100%;
    }

    #Allow, #Deny {
        width: 150px;
        height: 20px;
        padding: 5px;
    }
NOTE
You can restrict one or more different extension files by giving file extension separated by comma (,)
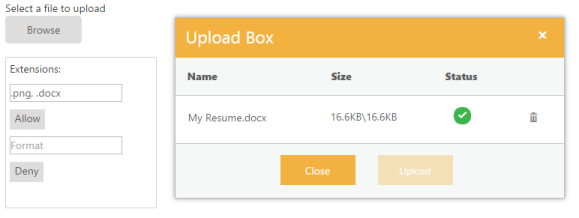
The following screenshot displays an Uploadbox control with the file extension.
The above screenshot shows the Uploadbox that allows “.docx” and “.png” files.
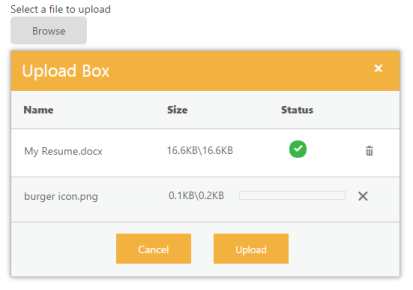
Upload Multiple Files
To upload multiple files in UploadBox control, click the Browse button and select multiple files from file explorer window
The following screenshot displays an UploadBox control with multiple files selected.
@Html.EJ().Uploadbox("UploadDefault").SaveUrl(@Url.Action("Save")).RemoveUrl(@Url.Action("Remove")).MultipleFilesSelection(true)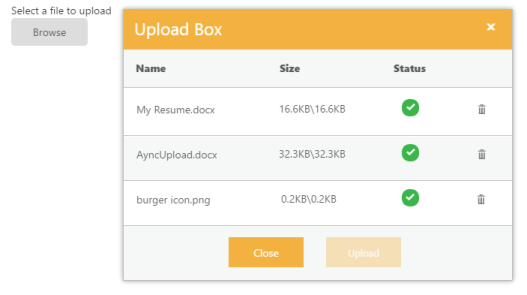
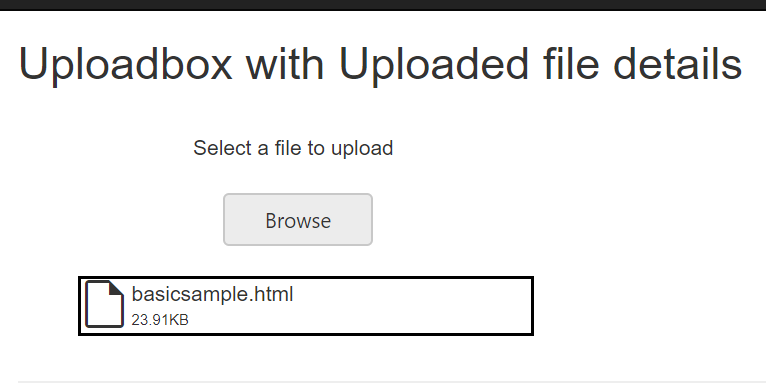
Display uploaded File Details
To display the details of the uploaded files below the control, add an container element to display the details below the uploadbox control. Using the ClientSide success event we can access the details of the uploaded file and display it in the container element. Refer the following code.
<div class="frame">
        <div class="control">
            Select a file to upload
            <div class="posupload">
                @Html.EJ().Uploadbox("UploadDefault").SaveUrl("SaveDefault").RemoveUrl("RemoveDefault").AutoUpload(true).UploadBoxDialogAction(act => act.CloseOnComplete(true)).ClientSideEvents(e => e.Success("onSuccess"))
            </div>
        </div>
        <br />
        <ul id="uploaded" ></ul>
</div>function onSuccess(args) {
var msg = "<li class='green'><span style='display:inline-block;'><span class='e-icon e-file-empty'></span></span><span style='display:inline-block;margin-left:20px;'><span style='display:block'>" + args.files.name + "</span><span style='display:block;font-size: 10px;'>"+(args.files.size/1024).toFixed(2)+"KB</span></li>"
$("#uploaded").append(msg);
}#uploaded li {
list-style: none;
border: 2px solid black;
width:300px;;
}
.e-icon.e-file-empty:before {
font-size: 32px;
}The following screenshot displays an UploadBox control with file details of the uploaded file.